 KiwiScience
Part 2 · Field guide第二部分 · 野外手册
Planting native plants the right way用正确的方法种植原生植物
A practical guide to getting native seedlings into the ground so they survive — from fencing and pest control, through setting out and digging, to guards, weeds and follow-up.
一份让原生苗木下地后真能活下来的实用指南——从围栏与有害动物防治,到放样、挖穴,再到护苗罩、除草与后续管护。
What this part covers: how to place, plant and protect seedlings. It does not cover which species to choose — that is what the user guide and the Tika Tipu selector are for.
本部分讲什么:苗木如何定位、如何栽植、如何保护。它不讲该选哪些物种——那是使用指南和 Tika Tipu 选择器的职责。
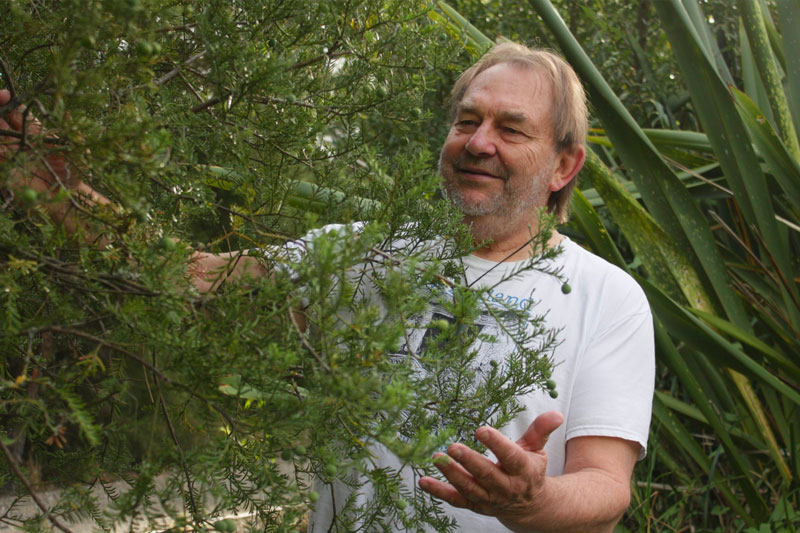
Good technique is the difference between a plant that thrives and one that sulks, blows over or dies. None of it is hard. Work through the steps below in order, and give each seedling the same care you would give the first one.
一株植物是长得旺盛,还是蔫着不动、被风吹倒、乃至死去,差别就在于栽植技术。这些技术都不难。请按下面的步骤依次做,并且对每一株苗,都拿出对第一株那样的用心。
1 Fence out stock first先把牲畜挡在外面
Cattle, sheep, goats, deer and horses will graze, trample and snap almost every native you plant, including tough species like manuka, kanuka and totara. Fresh nursery plants are especially tempting because of the nutrients they carry. So the single most important thing you can do before planting is put up a stock-proof fence. A good fence lasts for decades and lets natural regeneration take off as well.
牛、羊、山羊、鹿和马,几乎会把你种下的每一种原生植物啃食、踩踏、折断,连 manuka、kanuka、totara 这类皮实的树种也不例外。刚出圃的苗木养分充足,对它们尤其有吸引力。所以种植之前你能做的最重要的一件事,就是围一道能挡住牲畜的围栏。一道好围栏能用几十年,还能让天然更新自行展开。
Choosing a fence围栏的选择
- Deer netting, 1.8–2.0 m: excludes sheep, cattle, horses, goats and deer. The safest all-round choice next to farmland.
- Eight-wire post and batten: a strong barrier for sheep and cattle. Add an electric outrigger where horses, cattle or bulls lean on it.
- Two or three wire electric: holds cattle, but only while it is kept live at all times.
- Rabbit and hare mesh: fine mesh (aperture 50 mm or less) fixed to the fence. Extend it out along the ground about 400 mm on the pest side to stop digging, and up the face to 1.1 m to stop hares.
- 防鹿网,1.8–2.0 米:可挡住绵羊、牛、马、山羊和鹿。紧邻农田时最稳妥的通用选择。
- 八线桩板围栏:对绵羊和牛是很强的屏障。若有马、牛或公牛倚靠,再加一道外挑电线。
- 两三根线的电围栏:能拦住牛,但前提是随时保持通电。
- 防兔与防野兔细网:网孔 50 毫米以下的细目网,固定在围栏上。在有害动物一侧沿地面向外铺出约 400 毫米以防掘入,网面向上加到 1.1 米以防野兔。
Set plants back and shelter the edge. Keep the first row beyond the reach of any animal leaning over the fence. On open sites, plant your hardiest, fastest colonising species along the windward edge. They shelter the plants growing behind them and cope better with the odd nibble from the fence line.
苗木后退,边缘设防护带。第一排要退到任何动物探过围栏都够不着的地方。在开阔样地上,把最耐逆、定居最快的物种种在迎风一侧的边缘。它们既为后排植物遮风,也更经得起从围栏那头偶尔被啃一口。
Fit a gate so you can remove any stock that breaks in quickly.
装一道门,万一有牲畜闯进来,可以尽快赶出去。
Funding. Many regional councils and the QEII National Trust help with the cost of new fencing around retired riparian margins and bush. Ask before you start.
经费。许多大区议会以及 QEII National Trust,会为退耕河岸带和原生林周边的新建围栏提供补贴。动工之前先去问。
2 Knock back pests before you plant种植前先压低有害动物数量
Fences stop farm stock, but rabbits, hares and possums can still get in and do real damage to fresh seedlings. Run a control programme immediately before planting, when it counts most, then keep watching.
围栏拦得住牲畜,但兔、野兔和负鼠仍然能进来,对新栽苗木造成实实在在的损害。请在种植前紧邻的那段时间开展一轮防治——这时效果最关键——之后继续观察。
How to read the damage如何辨认危害痕迹
| Culprit | Sign on your plants | Best control |
|---|---|---|
| 元凶 | 苗木上的痕迹 | 最有效的防治 |
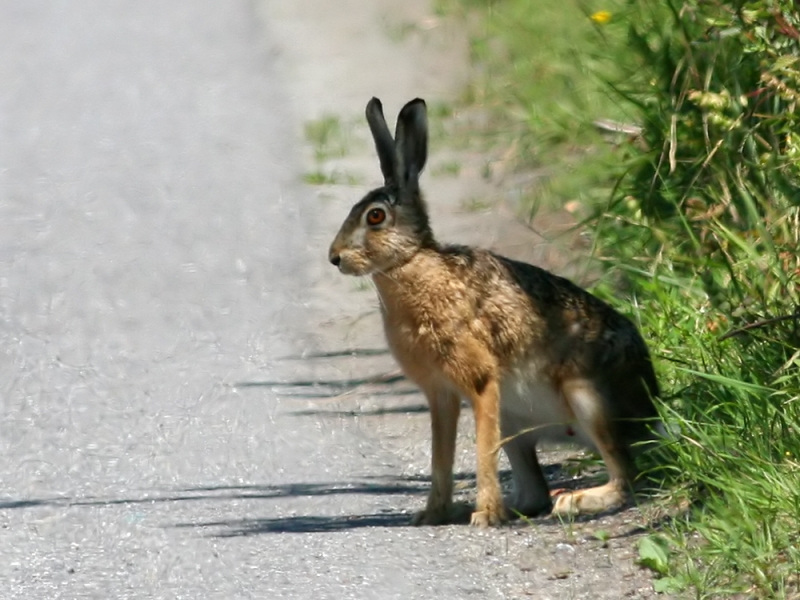
| Hare | Clean 45° cut of the main stem; top discarded nearby | Shooting (rarely takes bait) |
| 野兔 | 主茎被整齐斜切成 45°;断头丢在附近 | 猎捕(很少取食毒饵) |
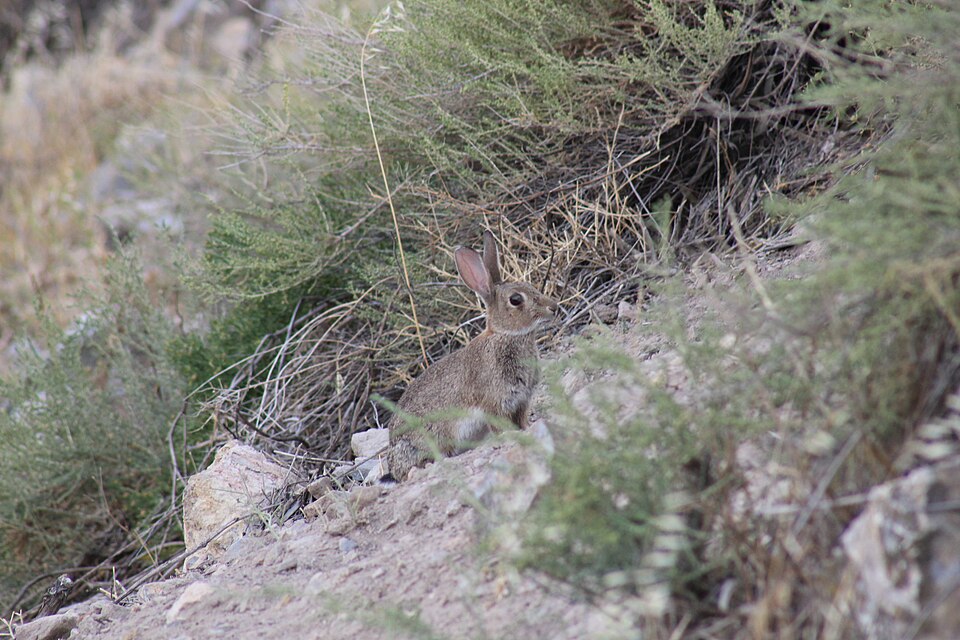
| Rabbit | Browsed leaves and stems; diggings; round droppings | Shooting or Pindone bait; fine mesh fence |
| 穴兔 | 叶和茎被啃食;有刨坑;圆形粪粒 | 猎捕或 Pindone 毒饵;细目网围栏 |
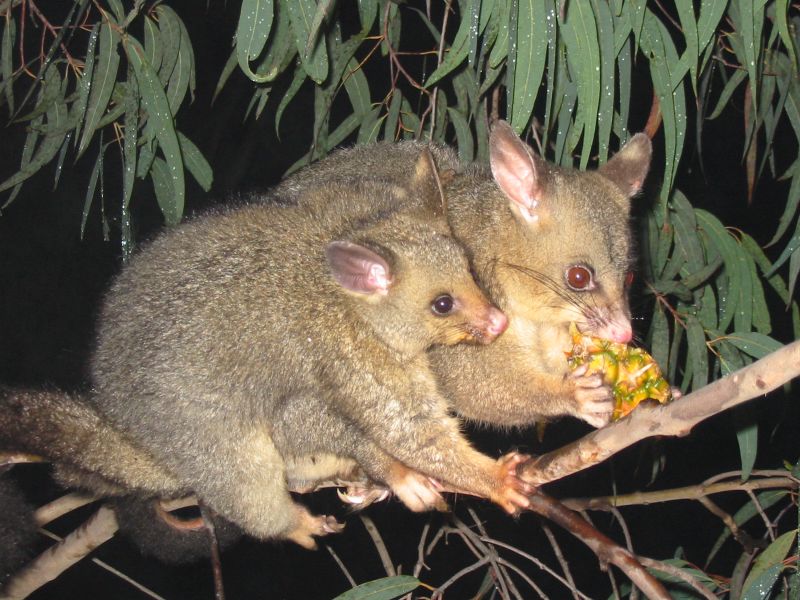
| Possum | Chewed new growth and flowers; damage to older saplings on edges | Trapping, shooting or bait |
| 负鼠 | 新梢和花被啃;林缘较大的幼树受害 | 陷阱、猎捕或毒饵 |
| Deer | Browsed tops; antler rubbing and ring-barking on saplings | Deer netting; hunting |
| 鹿 | 顶梢被啃;幼树被鹿角磨蹭、环剥 | 防鹿网;狩猎 |
| Goat / pig | Seedlings eaten to stubs (goats); rooted up and uplifted (pigs) | Fencing; hunting |
| 山羊/野猪 | 苗木被啃成秃桩(山羊);被拱翻掀出(野猪) | 围栏;狩猎 |
| Pukeko / weka | Fresh seedlings pulled out, often not eaten | Larger grades, firm planting; deterrents |
| pukeko/weka(新西兰秧鸡类) | 新栽苗被拔出来,往往并不吃掉 | 用更大规格的苗、栽实压紧;设驱避措施 |
Get expert advice on baits and traps to stay safe and get results. Monitor after planting and act fast on new damage. Keep follow-up control going until seedlings top one metre.
毒饵和陷阱的使用请咨询专业人士,既保证安全也保证效果。栽后要持续巡查,一发现新的危害就立即处置。后续防治要一直坚持到苗木高过一米为止。
3 Clear weeds before you plant种植前先清除杂草
Grass and weeds compete with young natives for light, water and nutrients. Effort spent controlling them before planting pays off many times over in less work later.
草和杂草会与原生幼苗争夺光照、水分和养分。种植前在除草上花的功夫,日后会以省下的工作量数倍地回报你。
Grass and pasture sites草地与牧草地
- Hard graze or mow within three months of planting to knock the sward down near ground level. This makes access, spraying and planting far easier.
- Spray if the grass is vigorous. Tough species like kikuyu usually need herbicide. Spray clean, green, actively growing foliage in early autumn or spring.
- Spot spray a patch for each plant when spacing is wider than 1.5 m. Blanket spray when planting denser than 1.5 m.
- Where grass is thin and weak, you may not need herbicide at all. Just plant soon after hard grazing.
- 在种植前三个月内重牧或刈割,把草层压到贴近地面。这会让进场、喷药和栽植都容易得多。
- 草势旺盛就要喷药。像 kikuyu(铺地狼尾草)这类顽强的草通常必须用除草剂。要在初秋或春季,对干净、青绿、正在旺长的叶面喷施。
- 株距大于 1.5 米时,为每株苗点状喷施一小块;种植密度高于 1.5 米时则全面喷施。
- 草层稀疏瘦弱的地方,可能根本不需要除草剂——重牧之后尽快栽植即可。
Going herbicide-free? It can work, but a sprayed pasture sometimes fills with worse weeds such as thistles, vines or gorse. Weigh that against the alternative of hand releasing plants from rank grass.
打算完全不用除草剂?这条路走得通,但喷过药的草地有时会被更棘手的杂草占据,比如蓟、藤本或荆豆。请把这一点与另一种做法——人工把苗木从密草里解放出来——权衡比较。
Woody weed sites (gorse, broom, blackberry, privet)木本杂草地(荆豆、金雀花、黑莓、女贞)
Dense woody weeds are the hardest sites. Poor preparation leads to vigorous regrowth that smothers your natives. Combine mechanical clearing with herbicide, and allow up to two years to get aggressive species under control before you plant. Planting a dense nurse crop of fast growing shrubs can then close a canopy within 2–3 years and hold the weeds down.
密生木本杂草是最难对付的样地。整地不到位,萌条就会疯长,把你的原生苗闷死。要把机械清除与除草剂结合起来,并预留最长两年时间,先把这些强势物种控制住再栽植。之后密植一批速生灌木作为"保姆林",2–3 年内即可郁闭成冠,把杂草压下去。
4 Where each plant goes每株植物栽在哪里
Placement is two decisions at once: matching each plant to the conditions it likes (its ecology), and arranging plants so they help you win the battle against weeds.
定位同时包含两个决定:把每株植物放到它喜欢的条件里(生态匹配),以及把植物排布得能帮你打赢除草这场仗。
Match the plant to the spot让植物与位置相配
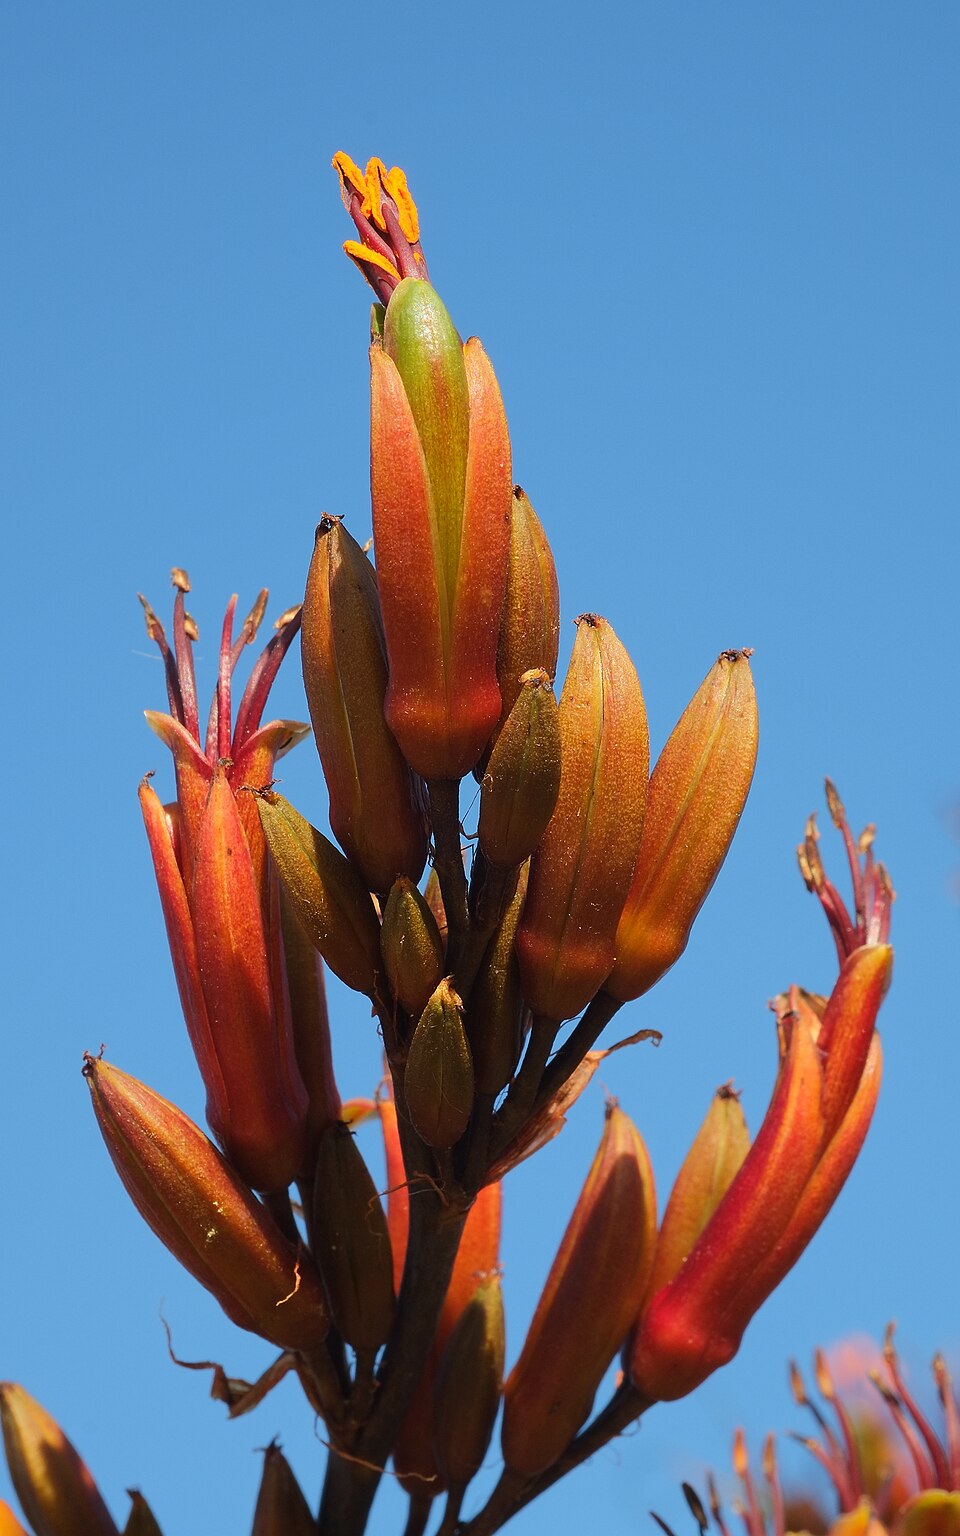
Put moisture-loving plants in the low, damp ground near water, and drought-tolerant, wind-hardy plants on dry ridges and exposed edges. Match shade-lovers to sheltered or shaded positions and sun-lovers to the open. A plant in the wrong spot struggles no matter how well you plant it.
喜湿的植物种在近水的低洼湿地,耐旱抗风的种在干燥山脊和暴露的边缘。耐荫的配到背风或遮荫处,喜阳的配到开阔地。位置选错了,栽得再好也长不顺。
Use spacing to beat weeds用株距来压制杂草
Spacing is your best long-term weed tool. Plant densely and the canopy closes sooner, shading out weeds and cutting years off your maintenance.
株距是你最有效的长期除草手段。种得密,林冠郁闭得就早,把杂草遮住,也能省下好几年的管护。
Dense planting at 1.2–1.5 m typically closes a canopy in 2–3 years and suppresses weeds, so you only spray or hand-release for a few seasons. Wider spacing means cheaper plants up front but more years of weed control. Choose the trade-off that suits your budget and labour.
按 1.2–1.5 米密植,通常 2–3 年即可郁闭并压住杂草,只需喷药或人工除草几个生长季。株距放大,前期苗木便宜,但除草年限拉长。请按你的预算和人力选择取舍。
5 Setting out the holes放样定穴
Lay plants out across the site before you start planting, at your chosen spacing. Offset each row so plants sit in the gaps of the row beside them. This triangular pattern gives the most even cover and the fastest canopy.
动手栽植之前,先按选定的株距把苗木在样地上摆开。相邻两行要错开,使每株苗正对旁边一行的空档。这种三角形排列覆盖最均匀,郁闭也最快。
| Planting aim | Rough spacing | What to expect |
|---|---|---|
| 种植目标 | 大致株距 | 预期结果 |
| Dense revegetation (fast canopy, least weeding) | 1.2–1.5 m | Canopy closes in 2–3 years; blanket spray |
| 密植植被恢复(快速郁闭、除草最少) | 1.2–1.5 米 | 2–3 年郁闭;全面喷药 |
| Shrubs and smaller trees | 1.5–2 m | Longer weed control; spot spray |
| 灌木与小乔木 | 1.5–2 米 | 除草期更长;点状喷药 |
| Larger trees | 2.5–3 m | Slowest canopy; most years of weeding |
| 大乔木 | 2.5–3 米 | 郁闭最慢;除草年限最长 |
Mark your plants. Push a 60–90 cm bamboo stake next to each seedling, on the same side every time (say the north side, within 15 cm). You will find every plant again quickly when you come back to weed or check it, even in long grass.
给苗木做标记。在每株苗旁插一根 60–90 厘米的竹竿,每次都插在同一侧(比如北侧,距苗 15 厘米以内)。日后回来除草或检查时,即使草长得很高,也能迅速找到每一株。
6 Digging the hole挖穴
Aim for a hole about twice the width and depth of the root ball. Loosen the sides and bottom and pull out large stones. Cultivating the spot improves drainage and lets roots push out quickly, which matters most on heavy clay or compacted ground.
穴的宽度和深度都应达到根团的两倍左右。把穴壁和穴底松一松,把大石块捡出来。把栽植点翻松能改善排水、让根系迅速向外伸展,这一点在重黏土或板结土上尤其重要。
- If dense grass covers the spot, skim it off with the spade first (screefing). Do not strip away too much topsoil.
- Drive the spade in with your boot and make several deep parallel cuts, tilting to loosen, then cross-cut. You want a well broken, crumbly planting spot.
- Using an auger on wet clay? Score any smooth, glazed sides with a spade. A glazed wall seals the hole and roots cannot get through it.
- 若栽植点被密草覆盖,先用锹把草皮削掉(screefing)。注意不要连表土也刮掉太多。
- 用脚把锹踩进土里,平行深切几刀,再撬动松土,然后交叉再切一遍。目标是得到一个碎散、松软的栽植点。
- 在湿黏土上用土钻?要用锹把光滑发亮的穴壁划毛。打磨得光亮的穴壁会把穴封住,根系穿不过去。
Auger sizes: a 150 mm bit suits large PB3 planter bags; 100 mm suits smaller grades. A motorised borer gives consistent hole depth, which is handy for community planting days.
钻头规格:150 毫米钻头适合 PB3 大号育苗袋;100 毫米适合较小规格的苗。机动钻孔机能保证穴深一致,组织社区植树日时很好用。
7 Out of the pot or tray脱盆与起苗
Take the plant out of its container at the planting spot, and keep as much soil around the roots as you can. A healthy root system binds the mix into a solid mass that holds together when the pot comes off.
要在栽植点旁才把苗从容器里取出,并尽可能保住根部周围的基质。健康的根系会把基质缠成一个结实的整体,脱盆后不会散。
- With root trainers and trays, ease plants apart gently. Roots often tangle with the neighbour beside them.
- Do not leave bare root balls sitting out. Exposed roots dry out fast, especially in sun or wind. Plant them promptly.
- Collect the plastic pots, bags and trays as you go and send them for recycling.
- 用穴盘或育根盒育的苗,要轻轻分开。相邻苗的根常常缠在一起。
- 不要把脱了盆的根团晾在一旁。暴露的根系干得很快,日晒或刮风时尤其如此。脱盆后要立即栽下。
- 边干边把塑料盆、育苗袋和穴盘收集起来,送去回收。
If the root ball falls apart when you remove the pot, the plant was not ready. Note it, plant it carefully, and raise it with your nursery next time.
如果脱盆时根团散开,说明这株苗还没长好。记下来,小心栽下去,下次跟苗圃提出来。
8 Disturb the roots, or not?要不要扰动根团?
The short answer: leave a good root ball alone, and only intervene when the plant is pot-bound. How much a plant tolerates root disturbance also varies from species to species, so err on the side of gentleness.
简短的回答是:根团完好就别动它,只有在根系已经盘满盆时才需要处理。不同物种对根系扰动的耐受程度也不一样,所以宁可轻一点。
- Good root ball: plant it as it is. Needless root disturbance only sets the plant back.
- Pot-bound plant: loosen the ball and tease out the fibrous roots, or cut and trim badly twisted ones, so roots grow into the surrounding soil rather than strangling in a circle.
- Species sensitivity: some natives resent root disturbance more than others. When unsure, handle the roots as little as the job allows.
- 根团良好:原样栽下。没必要的根系扰动只会让苗缓苗更久。
- 盘根的苗:把根团松开,理出须根,或把扭曲得厉害的根剪掉修整,使根系向外长进周围土壤,而不是绕成一圈自我勒紧。
- 物种差异:有些原生种比别的更怕动根。拿不准时,就在能完成作业的前提下尽量少碰根系。
The real fix for pot-bound stock is to reject it at the nursery. Remedial root work in the field is a patch-up, not a cure, and is impractical at scale.
对付盘根苗,真正的办法是在苗圃就把它退掉。在野外做补救性的根系处理只是打补丁,不是根治,规模一大也做不过来。
9 Filling the hole for survival回填:关乎成活
How you set the plant and firm the soil decides whether it lives through its first dry spell and its first gale.
苗怎么摆、土怎么压实,决定了它能不能熬过第一次旱情和第一场大风。
- Moisten first. If the root ball is dry, soak it in a bucket until the bubbles stop, then let it drain. A dry ball is hard to re-wet in the ground.
- Set the depth. Place the root collar (where stem meets roots) at least 5 cm below the surrounding soil. Plant deeper on dry, drought-prone sites so roots reach moist soil. In wet regions, do not plant deep or dish the surface, as ponding can rot the stem.
- Backfill and firm. Push soil back around the roots with spade and boot, and firm it down to remove air pockets. Keep a gentle upward pull on the seedling while you firm so the roots are not bent or folded.
- Check it holds. A shallow or loosely firmed plant will spin in the wind (planters call it twizzling) and fail. It should sit firm when you tug the top lightly.
- 先浸湿。根团若是干的,就泡进水桶里直到不再冒气泡,再沥干。干透的根团一旦入土就很难再吸水。
- 定深度。把根颈(茎与根交界处)放到比周围地面低至少 5 厘米的位置。干旱易旱的样地上要栽得更深些,好让根系够到湿土。多雨地区则不要深栽,也不要做凹面,积水会把茎沤烂。
- 回填压实。用锹和脚把土推回根系周围,压实以排出气穴。压实时对幼苗保持一点向上的轻提力,免得根系被压弯或折叠。
- 检查是否稳固。栽得浅或压得不实的苗会在风里打转(栽植工称之为 twizzling),最终死掉。轻轻拽一下顶梢,苗应当纹丝不动。
Do you need extras? On most sites, no. Fertiliser is usually unnecessary and fast-release nitrogen just feeds weeds; use only slow-release granules in the hole on very poor soils. Water crystals (hydrogels) show unclear benefit. Watering is generally not needed if you use well grown plants and plant deep. A degradable mulch (bark, wool mat, straw) helps hold moisture and suppress weeds at small scale.
需要额外措施吗?大多数样地都不需要。施肥通常没有必要,速效氮只会喂饱杂草;只有在极其贫瘠的土壤上,才在穴内放一点缓释颗粒肥。保水晶体(水凝胶)的效果并不明确。只要用长势良好的苗并且深栽,一般不需要浇水。可降解覆盖物(树皮、羊毛垫、稻草)在小面积上有助于保墒和压草。
10 Plant guards: yes or no?要不要用护苗罩?
A plant guard (such as a combi-guard) is a sleeve on stakes around the seedling. On the right site it earns its place. On the wrong one it is a cost and a plastic problem. Decide deliberately.
护苗罩(如 combi-guard)是套在幼苗外、用竹竿撑起的护筒。用在合适的样地上,它物有所值;用错了地方,它就是一笔开销加一个塑料问题。要慎重决定。
The case for guards支持用护苗罩的理由
Guards can lift survival and speed early growth. They shelter seedlings on exposed sites, reduce rabbit and hare browsing, and shield young plants from herbicide drift while you release-spray around them. Combi-guards bundle these benefits together. Some come with a coir mat at the base to hold weeds down. All of them need bamboo stakes to stay upright, and checking after wind.
护苗罩能提高成活率、加快前期生长。它在暴露样地上为幼苗遮风,减少兔和野兔的啃食,并在你围着它喷除草剂时挡住药液飘移。combi-guard 把这几项好处合在一起,有的还在底部配一张椰棕垫来压草。所有护苗罩都需要竹竿支撑才能立稳,大风之后还要逐一检查。
The case against反对用护苗罩的理由
- Cost and labour: roughly $1–2 each, plus the time to stake and maintain them. That rarely stacks up at large scale.
- Heat stress: plastic guards can cook seedlings inside during hot summers.
- They must come off: a guard left behind becomes litter and a hazard to the plant it protected.
- 成本与人工:每个约合 1–2 纽元,还要加上插竿和维护的工时。规模一大就很难划算。
- 热害:炎热的夏天,塑料护苗罩里面可能把幼苗闷熟。
- 必须拆除:留在地里的护苗罩会变成垃圾,反倒危害它曾保护的那株植物。
Plastic guards and microplastics. Corflute and other polypropylene guards persist in the environment for years. Sunlight, soil and weather break them down only slowly, and as they fragment they shed microplastics into soil and waterways, where they enter the food chain. Calling a plastic "degradable" does not fix this: it still leaves microplastic behind. Reuse plastic guards while they last, then remove them and recycle them. Do not leave them on site.
塑料护苗罩与微塑料。中空板(corflute)等聚丙烯护苗罩会在环境中残留多年。阳光、土壤和风雨只能缓慢地分解它们,而在破碎的过程中,它们会向土壤和水体释放微塑料,进而进入食物链。把塑料标为"可降解"并不能解决这个问题:它照样留下微塑料。塑料护苗罩要在还能用时反复使用,之后拆下回收,不要留在样地上。
Biodegradable options (wool, cardboard, hessian or jute) break down in place without leaving microplastics, which suits riparian and restoration sites. Wool-based guards commonly last a year or more before softening. Know their quirks: cardboard can attract paper wasps, and heavy jute can collapse onto small seedlings as it rots.
可生物降解的材料(羊毛、纸板、粗麻布或黄麻)能就地分解、不留微塑料,适合河岸带和生态修复样地。羊毛质护苗罩通常能维持一年以上才变软。也要了解它们的脾气:纸板会招来造纸胡蜂,而厚重的黄麻在腐烂时可能塌下来压住小苗。
Rule of thumb: use guards on small, high-value, or exposed and browse-prone plantings. On large sites, rely on good fencing, pest control and dense planting instead, and if you do use guards, choose biodegradable and commit to removing any plastic.
经验法则:面积小、价值高,或者暴露且易受啃食的种植,才用护苗罩。大面积样地应转而依靠好围栏、有害动物防治和密植;若确实要用护苗罩,请选可降解材料,并承诺把所有塑料件拆走。
11 Weed control after planting栽后除草
Keep weeds off your plants until the canopy closes, usually the first 3–5 years. You have two tools: the spray gun and your hands.
在林冠郁闭之前,要一直把杂草挡在苗木之外,通常是头 3–5 年。你有两件工具:喷枪和双手。
Release spraying解放性喷药
- When: mid-spring, once plants are established and showing new growth and the grass is getting competitive.
- How: apply a grass-and-weed herbicide in a 500 mm arc around the base. Cover the competing growth but keep it off the plant.
- Bonus: the dying weeds break down and act as mulch.
- 什么时候:仲春,待苗木已经缓苗、开始抽新梢,而草的竞争压力也上来的时候。
- 怎么做:在苗基部周围半径 500 毫米的范围内喷施灭生性除草剂。要覆盖与它竞争的草,但不能沾到苗上。
- 附带好处:枯死的杂草分解后正好充当覆盖物。
Hand weeding and releasing人工除草与解放
- Within 2–3 months of planting, hand-release plants smothered by grass. It is labour-intensive but precise, and needs no chemical.
- A common combination is spraying mature weeds, then hand-pulling the seedlings that follow.
- 栽后 2–3 个月内,把被草闷住的苗人工解放出来。这很费工,但精准,而且不用任何药剂。
- 常见的组合做法是:先喷杀成株杂草,再把随后长出的杂草幼苗用手拔掉。
Herbicide near natives. Careful spraying of glyphosate around most natives rarely harms them, but tolerance data is limited and species differ, so keep spray off foliage and stems. A guard or a physical shield helps. Follow the label and keep herbicide out of waterways.
在原生植物旁用除草剂。在大多数原生种周围小心喷施草甘膦,很少会伤到它们;但耐药性数据有限、物种之间差异也大,所以务必不要让药液沾到叶片和茎干。用护苗罩或挡板会有帮助。请遵守标签说明,并防止除草剂进入水体。
Note: herbicide use is a sensitive topic. Check current regional council rules and label directions before spraying, especially near water.
注意:除草剂的使用是个敏感话题。喷药之前请查阅所在大区议会的现行规定和产品标签说明,靠近水体时尤其如此。
12 Pests after planting栽后的有害动物防治
Planting does not end pest pressure. Rabbits, hares and possums keep testing your plants until they are big enough to shrug off a browse.
苗种下去,有害动物的压力并不会结束。兔、野兔和负鼠会一直来试探你的苗,直到它们长大到啃一口也不打紧为止。
- Keep watching. Walk the site regularly and act fast on fresh damage. Bamboo markers make plants easy to find.
- Control until plants top one metre. That is roughly when they outgrow the worst of the browsing risk.
- Plant big, plant firm. Larger grades (PB3, PB5) that are well firmed resist being pulled out by rabbits, pukeko and weka.
- Repellents applied at planting can help, but reapply after heavy rain.
- Less palatable, hardened-off stock takes browsing better. Retaining some tall grass around plants can also deter rabbits, though it competes for water, so balance the two.
- 持续巡查。定期走查样地,一发现新的危害就立即处置。竹竿标记让苗木很容易找到。
- 一直防到苗高过一米。大约到那时,它们就长过了啃食风险最大的阶段。
- 苗要大,要栽实。规格较大(PB3、PB5)且压得结实的苗,不容易被兔、pukeko 和 weka 拔出来。
- 栽植时施用驱避剂会有帮助,但大雨之后要补施。
- 适口性较差、经过炼苗的苗木更耐啃食。在苗木周围保留一些高草也能驱避兔子,不过这会争夺水分,要在两者之间权衡。
13 Planting day checklist种植当天清单
- Fenced to exclude stock, with mesh at the base if rabbits or hares are about.
- Pests knocked back in the weeks before planting.
- Weeds cleared by grazing, mowing or spraying; woody sites prepared well ahead.
- Plants laid out at your spacing, offset row to row, hardy species on the windward edge.
- Holes about twice the root-ball width and depth, sides loosened, no glazing.
- Root balls moist before planting; pots collected for recycling.
- Roots left intact if healthy, teased or trimmed only if pot-bound.
- Root collar 5 cm deep (deeper on dry sites; no dish in wet regions).
- Firmed so plants do not spin in the wind.
- Guards only where justified, staked, biodegradable preferred, plastic to be removed.
- Marked with bamboo stakes for easy release and monitoring.
- Follow-up plan for weeds (3–5 years) and pests (until plants pass 1 m).
- 已围好围栏把牲畜挡在外面;若有兔或野兔出没,基部加装细目网。
- 种植前数周已压低有害动物数量。
- 已通过放牧、刈割或喷药清除杂草;木本杂草地提前很久就开始整地。
- 苗木已按选定株距摆放到位,行间错开,耐逆物种排在迎风边缘。
- 穴的宽深约为根团的两倍,穴壁已松动,没有光滑发亮的壁面。
- 栽前根团已浸湿;育苗盆已收集待回收。
- 根系健康则保持原样,只有盘根时才理开或修剪。
- 根颈低于地表 5 厘米(干旱样地更深;多雨地区不做凹面)。
- 已压实,苗不会在风中打转。
- 护苗罩只在确有必要时使用,须用竹竿固定,优先选可降解材料,塑料件日后必须拆走。
- 已用竹竿做好标记,便于后续除草和巡查。
- 已制定杂草(3–5 年)与有害动物(直到苗高过 1 米)的后续管护计划。
• Sources and credits资料来源与致谢
This guide summarises current New Zealand restoration practice. For your own site, follow specific local advice and product labels.
本指南概述了新西兰当前的生态修复实践。落到你自己的样地上,请遵循当地的具体建议和产品标签说明。
Key references主要参考资料
- Tāne’s Tree Trust: How to plant native seedlings
- Tāne’s Tree Trust: Site preparation for planting natives
- Restore Native: How to release spray a tree
- Department of Conservation: Planning and planting a native garden
- NZ Plant Conservation Network: Revegetation
- Earth to Earth: Biodegradable vs plastic plant guards
- Arborgreen: Tree guards and microplastic pollution
Photographs图片
Photographs are hosted on Wikimedia Commons and remain under their respective licences. Open each image’s source page for the author and licence terms. Diagrams are original to this guide and free to reuse.
照片托管于 Wikimedia Commons,各自适用其原有许可协议。点开每张图片的来源页可查看作者与许可条款。示意图为本指南原创,可自由取用。
Prepared as a practical field reference for volunteers and landowners. Information is provided in good faith; assess it against your own site conditions and seek technical advice where needed.
本指南作为面向志愿者与土地所有者的实用野外参考而编写。内容出于善意提供;请结合你自己样地的实际条件加以判断,必要时寻求技术咨询。